Space Management
====
## Create new Inventory Spaces
The default Inventory contains two
folders: **Materials** and **Methods**. These are openBIS *Spaces*.
Additional *Spaces* can be created by an *Instance admin*.
### Create a new Inventory Space from the ELN UI
From openBIS version 20.10.4 it is possible to create *Spaces* directly
from the ELN interface.
To create a new *Space* under the Inventory:
1. Select **Inventory** in the main menu
2. Click on **+New Inventory Space** in the Inventory page

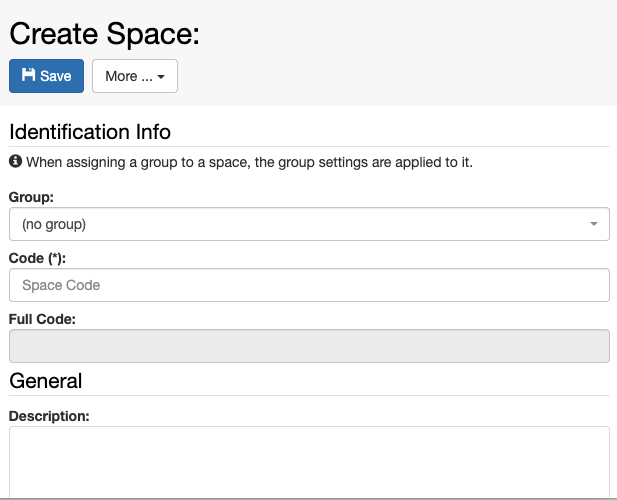
3\. Enter the **Code** for the *Space*, e.g. EQUIPMENT. Please note that
codes only accept alphanumeric characters, –, . , \_.
4\. **Save**

#### Multi-group instances
In a multi-group instance, the *Instance admin* can choose where to
create a new *Space*:
1. **no group**. The new *Space* will have no prefix and the Settings
defined in General Settings will apply (see [General ELN
Settings](./multi-group-set-up.md#general-eln-settings)).
2. **in one of the existing groups**. The new *Space* will have the
group prefix and the Settings of that group will apply (see [Group
ELN
Settings](./multi-group-set-up.md#group-eln-settings)).

### Create a new Inventory Space from the core UI
In the core UI:
1. Select **Admin -> Spaces**
2. Click **Add Space** at the bottom of the page
3. Enter the *Space* **Code**, e.g. **EQUIPMENT**
4. **Save**

#### Set Inventory Spaces
When new *Spaces* are created in the core UI, they are automatically
displayed under the *Lab Notebook* part of the ELN main menu.
It is possible to move a new *Space* to the Inventory, by editing the
**Settings** under **Utilities** in the **ELN UI:**
1. Go to the **Settings** and click **Edit.**
2. Go to the **Inventory Spaces** section in the **Settings** and click
the **+** button as shown below.
3. Select the *Space* you want to move to the *Inventory* from the list
of available *Spaces*.
4. **Save** the Settings.
5. Refresh the browser.

Updated on April 26, 2023
## Create new ELN Spaces
### Create a new Lab Notebook Space from the ELN UI
From openBIS version 20.10.4 it is possible to create *Spaces* directly
from the ELN interface. To create a new Space under the Inventory:
1. Select **Lab Notebook** in the main menu
2. Click on **+New** **Space** in the Lab Notebook page

3\. Enter the **Code** for the *Space*. Please note that codes only
accept alphanumeric characters, –, . , \_.
4\. **Save**

#### Multi-group instances
In a multi-group instance, the *Instance admin* can choose where to
create a new *Space*:
1. **no group**. The new *Space* will have no prefix and the Settings
defined in General Settings will apply (see [General ELN
Settings](./multi-group-set-up.md#general-eln-settings)).
2. **in one of the existing groups**. The new *Space* will have the
group prefix and the Settings of that group will apply (see [Group
ELN
Settings](./multi-group-set-up.md#group-eln-settings)).


Use cases where this could be useful:
1. in a multi-group instance with user folders in the Lab Notebook it
is desired to have in addition some *Spaces* that are not linked to
a particular user, but maybe rather to some projects.
2. in a multi-group instance it is not at all desired to have the lab
notebooks organised by users, but rather by projects. A *system
admin* can configure the user management config file not to create
users folders in the lab notebook section (see [Multi group instances](../../../uncategorized/user-group-management-for-multi-groups-openbis-instances.md)).
The rights for *Spaces* not belonging to any group need to be manually
assigned by an *Instance admin*.
### Create a new Lab Notebook Space from the core UI
In the core UI:
1. Select **Admin -> Spaces**
2. Click **Add Space** at the bottom of the page
3. Enter the Space **Code**, e.g. **EQUIPMENT**
4. **Save**

By default all *Spaces* created in the core UI are shown under the Lab
Notebook part of the ELN UI.
Updated on April 26, 2023
## Delete Spaces
*Spaces* can be deleted by *Instance admins* or by *Space admins*.
To delete a *Space*:
1. Click on the **Space** in the main menu
2. Select **Delete** from the **More..** dropdown

3\. Provide a **reason** for deletion
4\. **Accept**
Notes:
*Spaces* are not moved to the trashcan, but they are permanently deleted
straight away.
*Spaces* can only be deleted when they are empty and no entries
previously belonging to the *Space* are in the trashcan.
Updated on April 26, 2023
## Move Spaces between Lab Notebook and Inventory
If a *Space* belongs to the Inventory, this information is stored in the
**ELN Settings,** under the section **Inventory Spaces.**
To move a *Space* from the Lab Notebook to the Inventory, click on the
**+** button on top of the **Inventory Spaces** section, select the
*Space* you want to move and **Save** the Settings.
To move a *Space* from the Inventory to the Lab Notebook, click on the
**–** button next to the *Space* you want to remove in the **Inventory
Spaces** section and **Save** the Settings.
ELN Settings can be edited by Instance admins, group admins in
multi-group instances and by anyone with admin rights to the
ELN\_SETTINGS *Space*.

Updated on August 2, 2022